https://lizscreativecorner.blogspot.com/http://lizscreativecorner.blogspot.com.au/p/my-canvases-and-altered-art.htmlhttp://lizscreativecorner.blogspot.com.au/p/my-tutorials.htmlhttp://lizscreativecorner.blogspot.com.au/p/challenges_24.html

Pages

My Lovely Friends,

Sunday 30 July 2017

All You Need Is Love

Hi guys, I'm here today to show you a card I made suitable for a Wedding or an Anniversary,
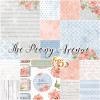
I again used the fabulous Studio 75 paper pad, The Peony Avenue in 6" x 6", so love this pad as there's some totally gorgeous papers and colours in there,
As usual all links below!!

This time I based my card on these adorable papers, I so love the script paper, again I distressed the paper on the edges, a thing I love to do!!

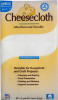
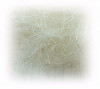
I added some cheesecloth around the outer edges of my top layer to give a shabby chic look, simply curling the edges in on itself a little, I added a strip of Rebecca lace along the width in the middle of my card then built up my floral decoration,


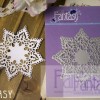
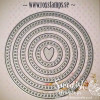
I cut a doily out of one of the papers using a Fantasy Bazaar Doily die, these cut so cleanly through first time, then on top of that I added a tag cut from one of the papers, onto this I placed a gorgeous button Wilma in white,


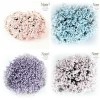
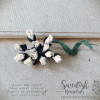
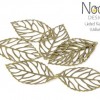
The gorgeous  white Foamiran  flowers were made by the lovely Tracy so I used these as the main feature simply adding a paper leaf, some meadow spray and another Foamiran flower this time made by me, lol
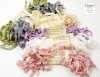
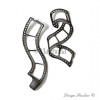
I then finished off the arrangement with some gorgeous vintage seam binding and some leaf detail using  the Fantasy trailing leaves die,


Shown in more detail above, I then used these adorable silver hearts which were from my stash,


Friday 28 July 2017

Some Foamiran Roses

Hi guys, I thought I'd show you some more Rose type flowers I made with some Foamiran,
I totally love this stuff at the minute, lol


I used pink Foamiran for the centres, and white Foamiran coloured with pink and reen Geletos on the edges of the petals, then Olive Green hand cut for the leaves again coloured a little with pink Geletos,
The die I used for the petals was the Peony die from Love to craft and Create, yes it's a Peony die but I made it into a rose, love that you can get different flowers out of one die set,

Well I'm looking after Tegan again today, so hopefully will catch up with you all later, lol
Happy Crafting!!

Wednesday 26 July 2017

Happy Birthday to you

Hi guys, I'm busy looking after Tegan these next few weeks, but I couldn't resist having a play with one of the latest Tilda stamps from the Magnolia Yay it's your Birthday collection, which will be available soon from Swedish House Crafts
Suha has lots of gorgeous goodies including some fabulous dies, stamps, Maja Design and Pion  papers to name but a few in her online store, at fabulous prices too so go check them out!! lol
Anyway onto my latest card!!


So Tilda is coloured with some of my distress inks, then I cut her out with a cross stitched circles die, 


this is currently out of stock but if you would like one contact Suha to be put on a wishlist, these dies cut a dream as do the Gummiapan dies that I did the base design with, all links to the products below,
This set of dies is called Old paper and I love it!!!


*****These adorable heart dies along with some other brand new dies are going to be on Hochanda soon as Suha is doing a Debut show on the 3RD of August at 4pm, so one to watch for sure!!!****


I finished them off with a little twine from my stash,
The papers are from one of my favourites by Maja Design, the  Sofiera collection, swoon!!!


I then added one of the fabulous film strips by Magnolia underneath some flowers, the gorgeous white rose bud and leaf are available from Suha's online shop along with some other gorgeous ones too, the other flowers are from my stash,


The top of my card has a text from my stash used with one of the fabulous banner dies again by Gummiapan, these dies really do cut beautifully and are such a good price too,


Full view again showing the fabulous umbrella by Magnolia too,
Do check out the awesome goodies Suha has in store, some are Swedish designs so not seen much elsewhere in Britain, well worth a look,
I will of course be back with another DT card soon,

Sunday 23 July 2017

Capture The Moment

My latest project to show you has used some of the latest gorgeous products and some of the older, though no less gorgeous products from Tracy's shop,
I had this pen holder in my stash forever, never quite knowing how to alter it and then inspiration bit me on the backside and so here it is, lol
I decided to leave the rest of the box plain to make the top the statement!!!


Now as per usual for me I've picked something a little hard to photograph!!! but hopefully you get the gist!! I will add some close ups for you too,


So first of all I added one of the gorgeous papers from the Studio 75 The peony Avenue 6" x 6" paper pad, simply distressing the edges which distress fabulously, I had to join the paper as my box was longer, but it didn't matter as I was adding layers on top so it didn't show,
My next said layer was the gorgeous Rebecca Lace, which just happened to fit perfectly width ways on the top!!!, then at the back I added the fabulous Capture the Moment script by Scrapiniec, so love their chip boards, I simply went around the edges with some vintage photo distress ink,
Next I used one of the adorable pen nibs from Tracy's store adding a feather from my stash to the length, then of course I hid most of it,


At the other end of my Pen holder I added this resin Dresser then made a floral display round it using some of the meadow spray flowers, Gypsophilia and a beautiful Wilma button in pink, as usual all links below,


In the middle section, after the Lace, I added some Sisal then layered a couple of handmade roses I made with some Ivory Foamiran and the Rosy Dot Heart die, using the 3 petal die for both, I then used some green Foamiran and hand cut the leaves etc, I then finished the whole thing off with a metal leaf towards the back and a pearl string wound around the arrangement,


I love to have  a play with Foamiran, so Addictive!!! lol
For the opener I simply added another gorgeous bit of bling the Button Gloria, 


And here's the full view again!!


Thanks for looking!!!