https://lizscreativecorner.blogspot.com/http://lizscreativecorner.blogspot.com.au/p/my-canvases-and-altered-art.htmlhttp://lizscreativecorner.blogspot.com.au/p/my-tutorials.htmlhttp://lizscreativecorner.blogspot.com.au/p/challenges_24.html

Pages

My Lovely Friends,

Wednesday 19 December 2018

Christmas Wishes

For a lovely Happy, Healthy Christmas for you all,

well it's nearly here, are you ready for the big day?

I have my last two Christmas cards to show you for this year,

I used a star shape for both cards, just embellishing them differently,  I used Stamperia papers from the Blue Land pad, simply distressing the edges and adding a little vintage photo distress ink, then using a scene from one of the papers I placed this behind this gorgeous chipboard by Snip Art that I found in my stash, I added some 13 Arts silver glitter paint over the top, believe me in real life it looks gorgeous, all sparkly!!!


I then added a Poinsettia I made using silk foam and the leaves Lady E Designs 002 die, then some grey stamens from 14 Craft Bar, I again added some of the 13 Arts glitter paint over the top, behind I added some of the leaves die 002 which I cut out of some more of the paper,

Challenge
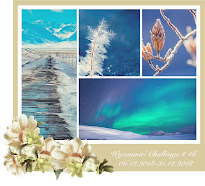
Snip Art - Mood board #46

Current challenge / Current challenge


The second card I used a chipboard by Scrapiniec again in my stash, I added the 13 Arts Glitter paint over this too as well as the Poinsettia flower which I again made out of silk foam and stamens from Swedish House Crafts, again I used used the leaves die 002 which I cut out of Kraft, simply adding a little of the 13 Arts Glitter paint on the edges,

Challenges
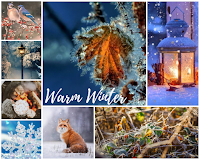
13 Arts - Mood board #73


MERRY CHRISTMAS
AND A 
HAPPY NEW YEAR

Tuesday 18 December 2018

HO HO HO!!!

Hi guys, well the big day is nearly here, are you ready yet? 
I'm here today with another Christmas card hopefully a little inspiration for you if your still making your cards,


I created my card using the gorgeous papers by Roxstamps from the Peaceful Christmas pack, these papers have two of the same papers in the pack, so I used the adorable Santa with his sack from one of the papers on the base of my card then fussy cut the Santa from the other one and layered him over the top using 3D foam pads,


I created the star shape in the centre of my card using the Gummiapan old stars dies, I die cut two of the sizes of the old stars die in the middle of some 6" x 6"  Kraft card then layered the card stock pieces up to give depth, behind the smaller one I added a picture from one of the other papers in the pack,


I made my poinsettia using  some Foamiran in red simply adding some glitter on the edges when I  had layered it up, behind the flowers are some leaves made with the Lady E Designs Leaves 003 die, these I cut out some paper from the Laserowe Love Winter song collection paper pack, then I also used some of the lady E Designs Leaves 004, these I cut out of some more paper then added a hint of colour on the edges here and there with some vintage photo distress ink and finally a little glitter,
Peeking out from under the flower and leaves is a adorable snowflake chipboard by laserowe Love designs


I then added some lovely jingle bells to hang below the flower too,


As I mentioned before I fussy cut out the adorable Santa and as you can see I also used the Gummiapan fluffy Trees dies too, these again I cut out of paper simply adding some glitter on the edges, I then added glitter along the base of my card and sides to give a lovely glittery effect,


I added some of the papers from the Roxstamps Christmas paper pack on the inside too,


I couldn't resist using the Gummiapan  High Reindeer dies which I cut out of Kraft card and fixed onto the the left hand side of the card,


Another paper was used here, I love the way this leaves a space for a verse or sentiment,

Gummiapan - Fluffy trees die ( once sold there Gone)


Happy Crafting!!!

Friday 14 December 2018

Christmas Will Soon Be Here

Hi guys, are you nearly ready for the big day yet?

I've made this card for my Sister and Brother - In - law, she saw the adorable chipboard in my stash and said she wanted a card made with it,


I used a couple of star dies a plain edged one for the larger base, then the middle one I used the Gummiapan Old Stars die from Swedish House Crafts, these have little nick effects on the edges which look fab, I placed a plastic snowflake decoration in between the layers,
I used a paper by Lemoncraft, I love wood effect papers and found it very hard to part with it, lol


I created a Poinsettia out of silk foam and Used the Lady E Design Leaves 002 for the flower, I simply coloured the middle of the top layer with a little oil pastel to match in with the colours, I used the same die set for the Calyx behind using olive green 0.6 Foamiran, behind the flower I used Lady E Designs Leaves 004 which I cut out of some white card stock and edges with a little vintage photo here and there, I also used some natural fibres,  glittery berries and an dried orange slice,
I found a holly leaf chipboard by Scrapiniec in my stash, this I heat set with some Frantage,


This is the Scrapiniec chipboard piece my sis saw and asked me to use for her card, so again I heat set it with some Frantage in Aged Ivory, love it!!!

Challenges
Lemoncraft - Christmas 

Happy Crafting!!!

Thursday 13 December 2018

Exciting News!!!!!!!!!!!

Hi guys, I have some awesome news to share with you, I am one of the brand Ambassadors for

As you know Emilia has some fabulous flower and leaves dies, which are great for
Foamiran as well as paper,

They all cut fabulously and are really easy to use, here are a few of my flowers made with the dies,


Roses made with Lady E Designs -  Flower 003 and Leaves 001


Lady E Designs dies - Flower 001, Flower 004


Flower die - Flower 002,  Leaves 002, Leaves 003


Lady E Designs - Poinsettia dies


You can find them at 
Lady E Designs

Here's the fabulous Brand Ambassadors for Lady E Designs,


Happy Crafting!!!


Tuesday 11 December 2018

CAS Mans Card

Hi guys, I mean what a CAS card by me, unheard of!!!

Well I went to a craft fair recently and saw one being demonstrated and thought I have to have a go with that, lol

So here it is!!


No flowers, leaves, twine yep defo CAS lol
But i love the effect on it's own,

I made a circle mask for the main circle so I could create the scene onto some black card,
I then using a brush added some hill effects with another mask I made myself,

I then used a smaller circle mask for the moon just using some of it, so it gave a half moon effect,


I placed my scene onto a stamp positioner by Tim Holtz and placed the Trees where I wanted them to be, then I used some watermark pad to stamp the trees, after I poured some fine detail embossing powder over them and heat set them with my heat gun,


I did the same with reindeer and the houses on the left,

Not too bad for a first attempt I think,

To finish my card off I just applied my scene to a larger circle for the card base,

This ones for hubby, he he

Happy Crafting!!

Saturday 8 December 2018

Foamiran Roses A hint of spring on a Winters day

Hi guys, I've had a change for making Christmas stuff so I thought I'd show you some Roses I've created in 0.6 Foamiran and using the fabulous Lady E Designs die 003 and Leaves die 001

I used Silk Suite foam which I coloured with some Gallery oil pastel - Deep Madder along the petal edges, 


I created various sizes of flowers including buds, as you can see some are more open then others,
I used 0.6 Foamiran for the Calyx's again coloured with the oil pastel,

I took some 0.6 green Foamiran for the leaves and die cut them out, then heated them for a few seconds against a warm iron and placed them straight away onto a mould, I have previous video's showing this step on my tutorials section at the top of my blog if you wish to see it,
after getting the veins on the leaves I went over the leaves with again the same oil pastel, which gives the leaves a different look from being left in their green colour, then I added some wire to the leaf bases,


I had a go at making the bud effects under my flower heads with some air dry clay, then I wrapped some floral tape over the top, this I then coloured with some more of the oil pastel, see how different the colour looks depending on what you've used it,


I also added some thorns with hot glue here and there, think I need to practice or get a new glue gun!!! lol


I made these roses to go in a display, so I kept the stems longer, 


I'm thinking of adding some more leaves or something around the base though, not sure!! hmm decisions, decisions, decisions!!!!
as it is I just added some dry oasis in my plant pot,stuck the flowers and leaves in where I wanted them and added some dried moss over the top,

I will be back soon with more Christmas creations,LOL
Happy Crafting!!

Friday 7 December 2018

Another card for A Man

Hi guys, I thought I'd show you last fellas card in my series of similar themed Mens cards,


This time I made a shaker card, using the same First Edition papers all that Glistens,
I layered my papers up after distressing the edges, 
Behind the star shaker I die cut a Gummiapan Doodled circle die out of Kraft card, added some sisal over the top, after fixing the shaker in place, I used hot glue to add some cinnamon sticks, dried orange and a little bit of chipboard by Scrapiniec,

I finished the card of with a die cut Deer out of Kraft card,

Happy Crafting!!!

Tuesday 4 December 2018

Winter Song

Hi all, I'm here today to show you another Christmas card I've made for Swedish House Crafts DT,
this time I've used the gorgeous papers by Laserowe Love from the Winter Song collection, wow they are stunning!!!


They come complete with images to fussy cut and a some strips with more images on too, but more on that later,
I started by layering some of the papers on my card in different sizes, then added a strip of paper down the middle but slightly off centre, I die cut a Gummiapan doodled circle die out of Kraft card stock and fixed it in place, you can just see it peeking out from behind here and there,


I cut several layers of the Poinsettia images out as well as some cones, then I added a little water sprayed over the top, I then scrunched and  crinkled the images, then left them to dry, 

After drying layer them up to get the look you wish, I then added some liquid applique on the petal edges and some glitter in the centre of the flower, behind the flower I used a Gummiapan old star die which I cut out in one of the papers then simply edged it with some vintage photo distress inks, I also added some Gummiapan die cut trees which again I added some liquid applique on the edges,


As I mentioned earlier the collection comes with some strips with some more images on this fabulous frame effect is one of them, again I simply fussy cut it out, coloured the edges with vintage photo then added some 3D foam pads behind to raise it up from my card base, I couldn't resist adding this utterly adorable Gummiapan High Reindeer die on the top and I again added some liquid applique onto the Antler sections,


I finished the card off with some more liquid applique on the edges of some of the paper layers to tie in with the theme,


Gummiapan die - Fluffy trees ( grab these quick as they won't be back)
Gummiapan die - High Reindeers( Once the're gone the're gone)


Check out these and more gorgeous products over at Swedish house Crafts,

Happy Crafting!!!

Sunday 2 December 2018

I'm Dreaming Of.......

Hi guys, I've been playing with some mixed media again, and loved it!!!!

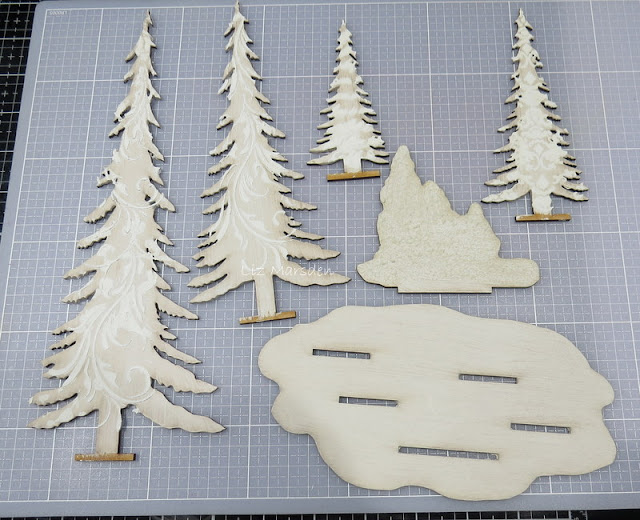
I recently went to a local craft event and one stall had these MDF items for sale and I just couldn't resist it!! well it just had to fall in my basket!!


I've also done a step by step tutorial on the trees,

So ok, I first of all painted the pieces with white Gesso, you know how to do that right? so I've skipped that, then I took a couple of different stencils from my stash and using some handmade paste added the patterns to my trees, I stippled some texture paste onto the smaller tree group without any stencilling and kept the base plate with only the white Gesso,


When the Gesso was dry I took some lace scraps from my stash and cut them up randomly, these I adhered onto the trees in various places, then when dry I wrapped some twine around the larger trees too,


I took some Prima Sparks paints and after first lightly spraying the tree with a little water I added a bit of paint on my brush here and there, then I added a little more water, I went over with some more paint and water till I got the look I wanted,


I still kept the group of trees fairly plain just adding the colours of paint in the same way as above,


I then fixed the trees onto the base,


I had previously stamped a stamp with versamark and heat set white embossing powder over the top onto a piece of vellum, this I then fussy cut around and fixed onto the front of the group of trees, using 3D pads, it looks squiffy on this picture but it is straight honest!! lol

I added some cheesecloth over the base, then added a layer of white Gesso, when dry I added some of my finishing embellishments,


I took some cinnamon sticks, glued them in place, then added a layer of crackle paste over them, this cracked fabulously when dry!! I heat glued a mini Bird by Dusty Attic on the top, which I had painted with the sparks paint then I used some 13 Arts silver Glitter paint on the wings, behind this I added some bird houses, I made the bases by using some waste chipboard, glued the houses and the bases together, then painted them again with the spark paints,


In front of my scene I added a word chipboard covered in stippled white Gesso then the dot on the I was painted with the 13 Arts Silver paint,
Here and there I added some vintage twigs in white by 13 Arts and some pine cones covered with a little white Gesso,
On the trees I added some gems in two colours here and there as well as some Finnabair glass micro beads,


This is the finished scene again, on the top of the house I added a crystal clear gem as a star effect, 
I then went over the edges of the trees with some white crackle paste to get the same effect as the log and to give the look of snow on the trees, lol


It really shines and sparkles in real life, 

Prima - white Gesso
Prima - Sparks Prima paints - Fairy wings/ (Unicorns hair/Birds) Mermaid Sparkle, Magical pond,
Deco Art texture sand, Finnabair Micro beads/ Splash, 13 Arts Silver glitter paint, 13 Arts white Vintage twigs, Dusty Attic - Mini words #1, Dusty Attic - Mini birds #1, Dusty Attic Mini Birdhouses, 

Challenges

It really was such fun to do hope, you like it too!!!
Happy Crafting!!